

- Boss Farming Shindo Life Guide - November 11, 2022
- Tengoku Shindo Life Guide - November 3, 2022
- Shindai-Rengoku Shindo Life Guide - October 20, 2022
Being an anime fan who is largely dissatisfied with most of the anime games developed out there, I view such games very critically. There are only a handful of games that use a popular anime franchise as a stepping stone to deliver a memorable experience instead of getting a quick bang for their buck. While I’ve mainly come across such games under big companies like Bandai Namco, I was quite astonished to find myself appreciating a relatively small-scale game like Shindo Life.
Shindo Life is a game inspired by everyone’s favorite childhood ninja anime, Naruto, that quickly evolved into a top-rated series with its 500-episode run as Naruto: Shippuden. While most Roblox games are just an unprofessional attempt at expressing love for what a fan may like (in this case, anime), RELL World genuinely went the extra mile to show their love for Naruto. As such, it is no surprise to see that people in the order of thousands appreciate their game and play it every single day.
What makes Shindo Life stand out from other anime-inspired Roblox mods is the sophistication that has gone into designing the experience. The three core mechanics of the game include Bloodlines, Ninja Tools, and Sub-Abilities, all of which genuinely motivate players to grind toward their goals of mastering a certain playstyle. While there are over 100 bloodlines in Shindo Life at the moment (yes, more get added periodically), the scope of this guide will be limited to the Renshiki bloodline.
Renshiki Overview
Bloodlines are the staple of every player, serving as a major determinant when it comes to gauging a character’s maximum potential. But how exactly are bloodlines ranked? Since bloodlines are mostly obtained through randomized rolls done by spins, the main metric for judging a bloodline’s potency is its rarity. Simply put, the rarer the chance of rolling a particular bloodline, the stronger your character has the potential to become.
With that said, Renshiki instead falls in the middle point of extremely rare and common bloodlines, although it doesn’t lag behind in terms of the number of movesets it offers. Once fully upgraded, Renshiki guarantees players three distinct moves.
Anime Reference
As far as references go, the Renshiki bloodline has to be inspired by Momoshiki Otsutsuki not only due to the resembling in movesets but also because the Renshiki (also reigning from the same bloodline) boss looks exactly like him, but teal in color.
Momoshiki is one of the more popular members of the Otsutsuki family because he was the antagonist that Naruto and Sasuke teamed up to fight against. Although first animated in the Boruto movie, their fight genuinely sent shockwaves across the community when it was spectacularly remade and outdone in the Boruto anime – it was truly a sight to witness!
Type
?file=RenshikiCharacter.png)
It’s important to remember that in Shindo Life, bloodlines are categorized into three different types: Eye, Clan, and Elemental bloodlines. You would imagine each category to have its outstanding set of bloodlines, but unfortunately, Elemental bloodlines have been left in the dust. Not only do most lack even a single mode, but their super common rarities also speak volumes on how they lag behind the other two types in terms of potency.
Even though some speculated Renshiki to be an Elemental bloodline, it was a relief to see it being a powerful Eye bloodline. Moreover, this key detail also reinforces the idea that the bloodline is most likely a reference to Momoshiki, particularly his eye, the Reningan (although it was red). Even though we all revere the Sharingan, the Reningan is overpowered in its own way.
Location
Upon release, I was under the impression that the Renshiki bloodline would be obtainable through the Renshiki boss (green variation of Momoshiki, as said before). This, of course, would make the powerful eye bloodline all the more accessible to players that won’t have to gamble their hard-earned spins. However, it turns out that the bloodline can only be obtained through luck by means of rolling, and the way the developers tied the boss into it was making him the gatekeeper of the bloodline’s second unlockable mode.
As far as rarity goes, Renshiki is considered to be more on the slightly lesser side of being a rare bloodline, having a 1 in 150 chance of getting rolled.
Movesets

Now let’s get on with the best part about any bloodline’s capabilities, the movesets. It’s important to remember that, as I said before, these do not get unlocked the moment you roll the Renshiki bloodline. Similar to other bloodlines, rolling for it is just the first step, because what comes after is leveling it up by not only leveling your character up but also grinding enough Chi and Ryo to meet the moveset’s cost.
Given how it takes a complete grind to actually utilize a bloodline to its maximum potential, whether or not Renshiki is worth leveling up will be discussed towards the end.
| Move Name | Level Requirement | Chi Cost (Unlocking) | Ryo Cost | Chi Cost (Use time) | Cooldown |
| Renshiki Style: Absorption | 200 | 520 | 500,000 | 5,000 | 20 Seconds |
| Renshiki Style: Kami Hammer | 400 | 1,600 | 1,000,000 | 25,000 | 23 Seconds |
| Renshiki Style: Kami Bomb | 700 | 2,200 | 1,000,000 | 35,000 | 25 Seconds |
Renshiki Style: Absorption

Starting off with the bloodline’s most basic, usually non-offensive move, known as Absorption. As the name implies, you’d be right to assume that this absorbs incoming attacks, but to what extent? Well, to be specific, upon activation, your character holds out their right hand and maintains a tight, glowing stance. If they are hit at any point during this stance (regardless of single or multi-projectile attacks), they replenish Chi for each hit (not damage point) and return the favor with a big beam attack. Although the stance lasts for a short duration, you can extend it upto 5 whole seconds by expending around 10k stamina.
Even so, it’s crucial to note that one must not rely on the counter beam as a source of damage. In reality, it does not do significant damage nor stunlock long enough for you to initiate a combo. So what really is its utility at the end of the day? Creating distance – the beam puts distance between you and the enemy, which, when coupled with physically backing away, is enough to allow for you to charge up your Chi fully.
Renshiki Style: Kami Hammer

In many cases, a grapple-type move is usually the third moveset unlocked, but as far as the Renshiki goes, it’s the second move you unlock! Upon activation, your character will quickly close the distance with your enemy (low to medium range) and throw them in a ragdoll effect with the Renshiki Axe. If you don’t recall, the Renshiki Axe is a rather rare ninja tool drop that you can get from defeating none other than Renshiki himself – interesting detail!
If you don’t have the Renshiki Axe in your arsenal yet, then Renshiki Style: Kami Hammer will keep you company as you will hurl and slam your enemies every time you successfully execute it. Furthermore, due to the nature of the ragdoll effect in this mod, you can give inputs beforehand. As such, my testing has shown that there’s roughly a one-and-a-half-second window after the grapple attack where you can use combo with another attack.
Even though I have glorified this grapple attack to a certain extent, I must admit that its damage output is relatively lacking in comparison to other bloodlines such as Vengeance’s Gadget Style: Grappling Combo. Hence, so far, your perception of this bloodline may be bleak, but I assure you the next moveset makes it all the more worthwhile.
Renshiki Style: Kami Bomb

Moving onto the crispiest part of Renshiki’s moveset kit, we have Renshiki Style: Kami Bomb, which would not be surprising to be described as a green spirit bomb (from Dragon Ball of course). Upon activation, your character will jump into the air and look down upon the enemy before blowing them into smithereens with a giant blast. It’s fair to assume that such a big attack has a decent AOE hitbox and is capable of stunning enemies upon impact, making it easier to follow up with other moves.
While you may be tempted to combo it with other moves, I have found it best to be used as a follow up to Renshiki Style: Kami Hammer. This is because the attack has a start up time, and considering your character jumping is a dead giveaway of what’s coming next, it can be predicted and dodged. However, its start up time is not slow enough to not fit in the 1.5 second window Kami Hammer leaves you with.
Hence, the way I always pair the two moves together is first executing a successful Kami Hammer and then instantly following it up with Kami Bomb – this will almost always work. Even though Kami Hammer’s individual damage felt meager, when combo’d with Kami Bomb, the damage output is frightening.
Mode #1
Unlocked at level 400, Renshiki’s standard mode is perhaps the aspect of it that compels players to cower in fear and recognize the eye bloodline’s greatness. This is especially true at the time of release when people were contending it was the best bloodline in the game!
Before talking about the concrete bonuses and abilities, I can’t proceed without praising the physical transformation your character goes through when entering the Mode. You look exactly like Momoshiki – a white cloak, a pair of black horns, a reningan in the middle, white skin, absolutely everything!
Passive Bonuses
Renshiki’s passive bonuses are quite unprecedented in my experience, because the standard M1 attacks inflict different kinds of elemental effects. While in Mode #1, the first M1 burns, the second and third electrocute and the fourth slows the enemy down – in quick succession, just a simple M1 combo will be a nightmare for your enemies. Aside from that, let’s not forget that you can also fly in this mode, although it does consume stamina so I’d recommend using that trump card only when necessary.
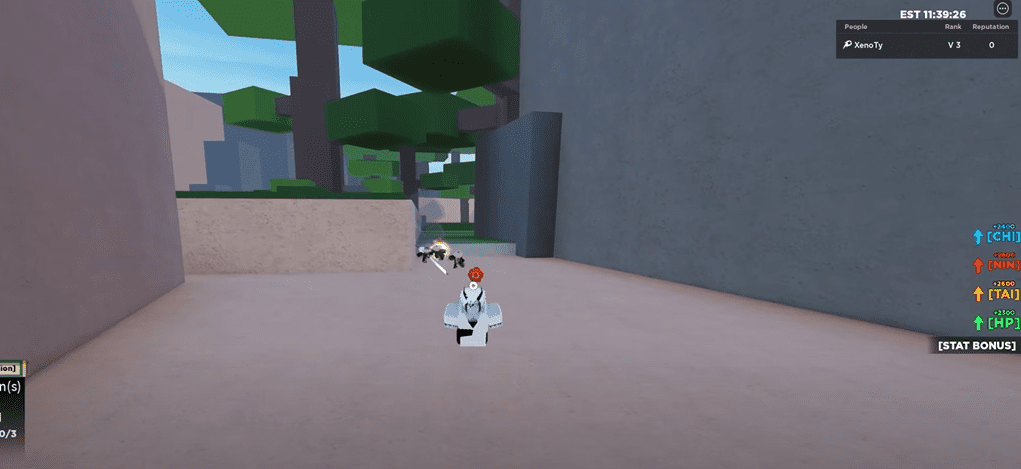
Stat Boosts
- +2,400 Chi
- +2,800 Ninjutsu
- +2,600 Taijutsu
- +2,300 HP
C Spec
Renshiki’s C Spec, although not as lethal as the Q Spec, is definitely the most reliable move in the bloodline’s arsenal due to how easy it is to land. Upon activation, your character quickly generates a large red bomb (similar to the rasengan) and, instead of hurling it towards the enemy, rushes over and slams it in their face. The ‘rushing’ aspect of the moveset is very fast and almost unavoidable due to the homing.
Upon impact, the red bomb explodes, hitting the enemy multiple times for a total of around 30k damage on average. Although it is balanced by having a 35 second cooldown, I’ll recommend using it as often as possible since it is the best move to abuse.
Q Spec
Renshiki’s Q Spec is quite amazing and really embodies the fiery part of the bloodline. Upon inputting Q, your character expends 25,000 Chi in order a summon a phoenix that spins around them, causing whirl AOE. Enemies caught in this fiery whirlpool take damage overtime before getting caught in a massive explosion as the phoenix fly towards them and detonates.
It’s important to point out that the whirlpool does not stun enemies inside of it, so enemies can still technically face tank everything and attack you. As such, I would recommend keeping a safe distance instead of trying to get up close and personal because the explosion is the major source of damage you should be relying on. The ability has a cooldown of 15 seconds.
Mode #2

Renshiki is one of the few bloodlines (let alone eye bloodlines) that come with two modes. However, the second mode isn’t gated behind a higher level requirement, but instead, can be unlocked by defeating the Renshiki boss in Vinland – he has a 1 in 15 chance of dropping it. As far as reaching Renshiki and the semantics of defeating him are concerned, that’s for a separate guide.
Passive Bonuses
Mode 2’s passive bonuses are far more overpowered than Mode 1’s. Not only does your character become a giant golem upon using melee attacks or blocking (consequently increasing hitbox and range), but it is still fast enough to execute full combos with. Apart from that, the enhanced M1s are also there, although now they mainly create magma explosions, dealing elemental fire damage.
Stat Boosts
- +2,400 Chi
- +2,800 Ninjutsu
- +2,600 Taijutsu
- +2,300 HP
C Spec
Mode 2’s C Spec is a direct reference to Momoshiki’s hydra-like attack from the anime that he uses after Sasuke seals him up with Planetary Devastation, triggering the next half of the bout. Upon activation, your character calls upon four hydras to emerge from the ground and immobilize the enemy before you, inevitably finishing them off a self-destructing phoenix.
You would imagine this move to be unblockable, but it technically can be avoided if your enemy has their guard up before getting grabbed by the hydras. As such, I would recommend using the C Spec as a follow up to the Kami Hammer and then follow it up with another attack because the move itself has significant stunlocking capabilities.
Q Spec
Mode 2’s Q Spec is the same as Mode 1’s Q Spec.
E Spec
Mode 2’s E Spec is the same as Mode 2’s C Spec, except that the cooldown is reduced to 15 seconds. You know what that means? More spamming potential!
Conclusion
In conclusion, the Renshiki bloodline is one of the best eye bloodlines in Shindo Life. Although two of its three moves are geared towards Chi charge-ups and combo extending, Mode 1 and Mode 2 is where the bloodline finds itself above the rest. As long as you have optimized Chi charge up and capacity, you are bound to have a fun time breezing through enemies that dare to challenge you in your Otsutsuki form.
FAQs – Renshiki Shindo Life
Question: How do I get spins for free?
Answer: While spins are definitely up for sale, most players can not afford the luxury of spending countless dollars on a game. As such, the developers make available several codes on a monthly basis and even more on special occasions and streams for players to collect. In fact, if you go on google right now and look up the codes for this month, you’ll find multitudes of them!
Question: What are Renshiki-Gold and Renshiki-Ruby?
Answer: Renshiki-Gold and Renshiki-Ruby are two variations of Renshiki that differ in just one department: color. Although there is no real incentive to grind for any of them, those interested should know that they are much rarer than the standard Renshiki bloodline, sitting at 1/250 and 1/300 respectively.
Question: How do I level up bloodlines quickly?
Answer: As I said before, spending countless spins on getting your desired bloodline is just the first step, because you’ll be doing an injustice to it by using it without upgrades. As such, I would recommend leveling them up (Renshiki, particularly), by regularly completing Scroll quests. Conversely, although a little discouraged, you could try sitting AFK at a Training Log and constantly hurl it with attacks (via auto-clicker) if you can afford to keep your computer running for that long.
Recommended Reads: