

- Boss Farming Shindo Life Guide - November 11, 2022
- Tengoku Shindo Life Guide - November 3, 2022
- Shindai-Rengoku Shindo Life Guide - October 20, 2022
Anime games form a large subset of Roblox mods because where big companies fail to develop games on popular franchises, the fans themselves step in and do it themselves on Roblox Studio. While 2022 has been filled with great Roblox mods inspired from animes like Demon Slayer and Attack on Titan, the now two-year-old Naruto mod, Shindo Life, remains as one of my favorites. Although that’s partially because Naruto and Naruto: Shippuden have been one of the main shows I grew up with, it’s also Shindo Life’s design choices that particularly appeal to me and many others.
To me, Shindo Life’s main appeal is its complexity and the sophistication that has gone into making this game. RELL World’s developers genuinely thought out game mechanics that would add diversity to a player’s experience, allowing them to find their own niche playstyle that would be adapted by some combination. The combination in question here refers to the three core mechanics of Shindo Life: Bloodlines, Ninja Tools and Sub-Abilities.
While all three mechanics are important, bloodlines stand out as something beginners first interact with. Upon starting the game, they are given two bloodline slots, where they can either roll for a random bloodline out of over 100 bloodlines or obtain one by completing special quests. One such bloodline that is obtained from a special question, which will also be the focus of this guide, is the Shindai-Rengoku bloodline.
Shindai-Rengoku Overview
Bloodlines are extremely crucial when it comes to gauging the potential of your character going forward. Being a very important determinant, what distinguishes the upper brass of bloodlines from the more common ones is their rarity. In other words, you can think of it as “the higher the rarity, the stronger the bloodline” because that’s often the case. Rarer bloodlines statistically require a lot more spin investment, especially since there’s surprisingly no “pity” mechanic, something that’s common for gacha systems. With that said, it is only natural for the developers to make rarer bloodlines stronger in order to compensate for the opportunity cost.
With that said, Shindai-Rengoku falls under the category of rare bloodlines, mainly because it requires one to defeat the Shindai-Rengoku boss. Of course, since the bloodline has a chance of dropping, there’s no guarantee you’ll get it on your first run.
Anime Reference
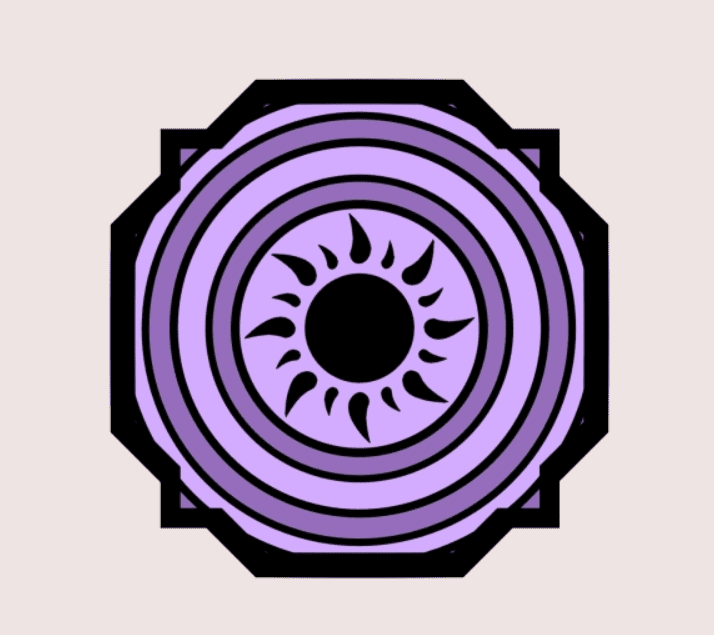
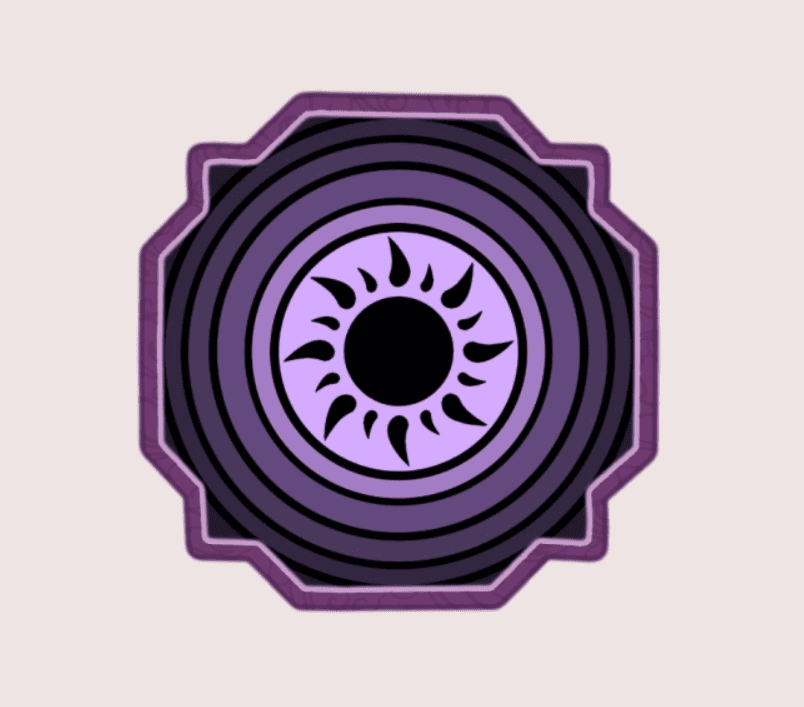
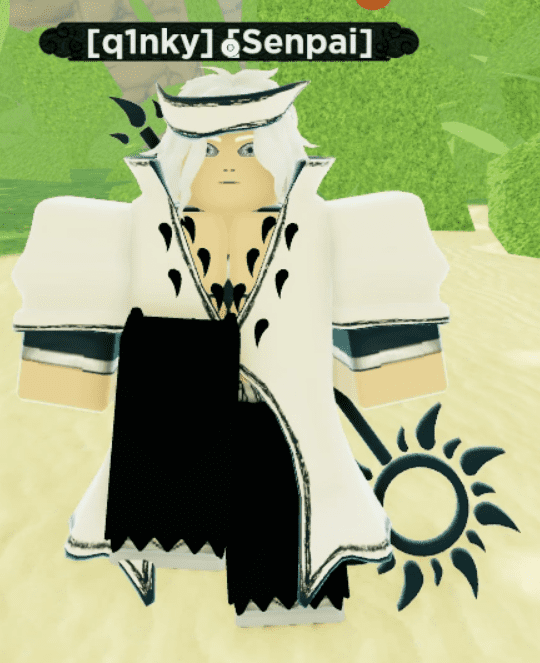
Just looking at the Shindai-Rengoku bloodline’s icon gives away the anime reference. Which eye is purple with a lot of circles in it? It’s the Rinnegan, the first of which we got to see in Pain’s possession in the anime. The Shindai-Rengoku is a little more complex due to the sun-like symbol in the middle (instead of a pupil dot), signifying the powerful Fire-style ninjutsu the bloodline comes with.
Since there were several variations of the Rinnegan seen in the anime from different users, I would attribute Shindai-Rengoku to Madara Uchiha’s Rinnegan. This is most likely what was in the developer’s mind when designing this variation of the original Rengoku bloodline due to the integration of the ten tails in its movesets.
Type
In Shindo Life, all bloodlines fall into one of three categories: Eye bloodlines, Clan bloodlines, and Elemental bloodlines. Moreover, Eye and Clan bloodlines are generally much stronger than Elemental bloodlines, so your preferences should definitely lean accordingly if you’re ever put in a situation to choose. With that said, it is fortunate to see that the Shindai-Rengoku bloodline keeps in line with the original Rengoku bloodline in the sense that it is an eye bloodline.
For someone like me, though, this was not a surprise at all since the Rinnegan is, in fact, one of the strongest eye techniques in Naruto, alongside the Sharingan and the Byakugan.
Location
Although a variation of the Rengoku bloodline, the Shindai-Rengoku bloodline was made available back in the September of 2021 with the Shindai-Rengoku event. The event climaxed with the Shindai-Rengoku boss, a replica of no other than Madara Uchiha himself, which also hinted towards his power. As such, the Shindai-Rengoku bloodline had a 1/20 chance of dropping from this 2000-HP boss whose aggression was genuinely unparalleled.
It’s important to note that, even though this event was over a year ago, the Shindai-Rengoku bloodline remains obtainable. Simply scroll down the Main Mission menu until you start seeing events, more specifically “Event: SHINDAI”. Here, you can either join a private lobby and fight Madara (aka Shindai-Rengoku) with your friends or go public and hope someone carries you!
Movesets
Now let’s talk about what exactly makes the Shindai-Rengoku a bloodline to reckon with – some even call it the most broken bloodline in the game, which is not that astonishing considering it’s Madara reincarnated. However, do bear in mind that you won’t become Madara the moment you roll this bloodline because, just like every other bloodline, you need to level up in order.
Aside from leveling up, there are Ryo and Chi requirements to unlocking each moveset of the bloodline – they are as follows:
| Move Name | Level Requirement | Chi Cost (Unlocking) | Ryo Cost | Chi Cost (Use time) | Cooldown |
| Rengoku Style: Under the Sun | 65 | 390 | 12,000 | 30,000 | 25 Seconds |
| Rengoku Style: Great Majestic Blaze | 450 | 1,650 | 40,000 | 30,000 | 23 Seconds |
| Rengoku Style: Tailed Spirit Counter | 750 | 2,420 | 60,000 | 65,000 | 25 Seconds |
Rengoku Style: Under the Sun
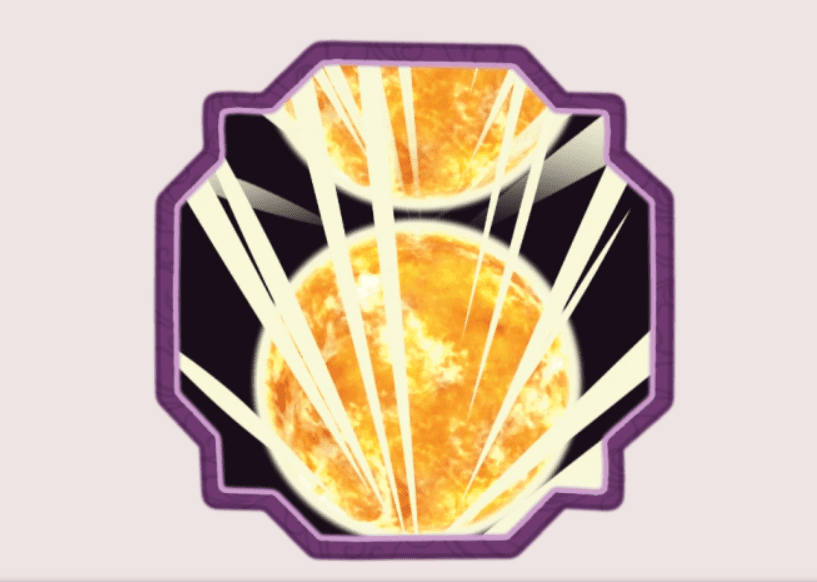
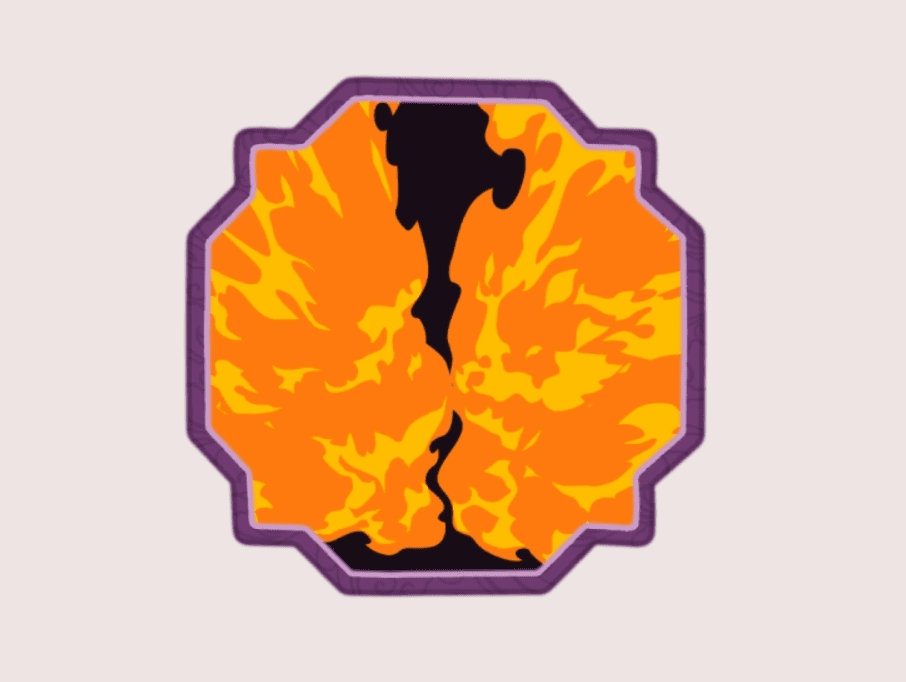
While the first move is mostly a passive one on many bloodlines, Shindai-Rengoku turns up the heat with Under the Sun. Upon activation, your character will disturb the intergalactic gravitational field and pull two meteors from the upper atmosphere, which will explode right in front of them and deal massive damage to anyone in the vicinity. This is clearly a reference to Madara Uchiha’s Tengai Shinsei, where he called upon meteorites over meteorites during his face off with the Shinobi Alliance.
Under the Sun is a devastating move that not only deals around 46k damage on impact, but continues to do damage for a small interval afterwards if the enemy stays in range. However, given the attack’s significant knockback, that’s hard to pull off unless you use moves to keep them in place. Even then, when accounting for Under the Sun’s 30,000 Chi cost, I would recommend against such tactic, even though all the hits combined total to around 76k damage.
Thus, what I find to be personally the best way of utilizing this move is to first execute a grapple attack (from another bloodline’s moveset, e.g Ragnar or Renshiki). This will stunlock your enemy for a short window after the move due to the ragdoll effect – then you should stand over them and use Under the Sun to get some massive free damage.
Rengoku Style: Great Majestic Blaze
In many cases, the second bloodline move is usually a combo extender, usually a grapple attack. However, while some make a similar statement for Great Majestic Blaze, I beg to differ, but that’s for you to determine as well – let’s understand what the move actually does. Upon activation, your character will leap into the air to get on top of the enemy before unleashing a flurry of blue flames upon them. These flames can damage repeatedly for as long as the enemy remains in them and will also eventually blockbreak them! Do bear in mind that some degree of aiming is required as the flames will spread in the direction of your cursor.
However, Great Majestic Blaze’s hitbox, when compared to a similar move like the Doku-Tengoku’s Twin Dragon Barrage, does come off as a little more inconsistent. This is purely going off my own personal experience where enemies clearly scorching inside my flames refused to take any damage! Regardless, rants aside, as you can already tell, it’s hard to use this move as a combo extender due to the startup time.
As such, my testing has revealed that there is a one-second window after a successful execute where the enemy will be burnt and stunned. For those who are familiar with insta-cast moves, they should know that this window, albeit small, is enough to extend a combo with moves like the Dio Senko Blade and Rykan Blade, two of the most agile ninja tools in the game. These are fairly obtainable, which is why I would recommend getting them if you wish to maximize the Shindai-Rengoku bloodline.
Rengoku Style: Tailed Spirit Counter
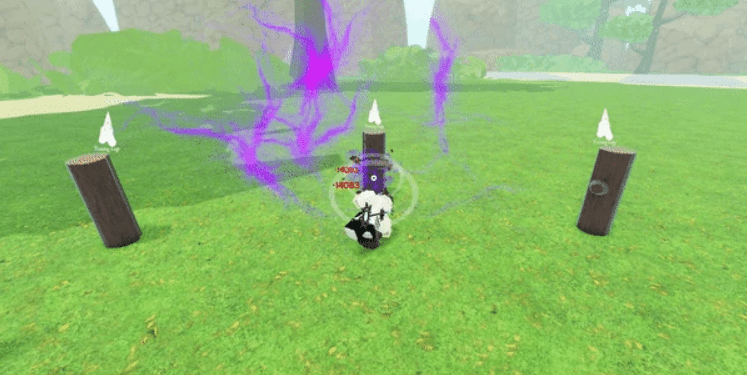
Shindai-Rengoku’s final move is perhaps the most jawdropping one due to how completely different it is from anything I’ve ever seen. Upon activation, your screen goes purple with the Shindai-Rengoku icon swirling around, indicating the counter window. If you are hit while in this phase, you’ll instantly dodge the attack, swap places with the enemy and have them greet your Kon Tailed Spirit clone covered with Susanoo armor. They will make a mess of your enemy before leaving them be, in regret of getting countered in the first place!
But there are caveats, as is the case with every great move. First, the counter is rather predictable due to the handsigns required to activate it. While this does make it harder to successfully counter someone in PvP, the AI in PvE is not smart enough to see it coming and will be very easy to make quick work of. With that said, if you do want to get some value out of it in PvP,, you’ll have to rely on good timing and catching your enemy by surprise – just use it wisely since it does eat up 65,000 Chi.
Mode #1
Unlocked at level 50, Shindai-Rengoku’s first mode is quite easy to get your hands on and is extremely overpowered to use at a beginner level. It has some pretty neat passive bonuses and three movesets that make for a diverse experience.
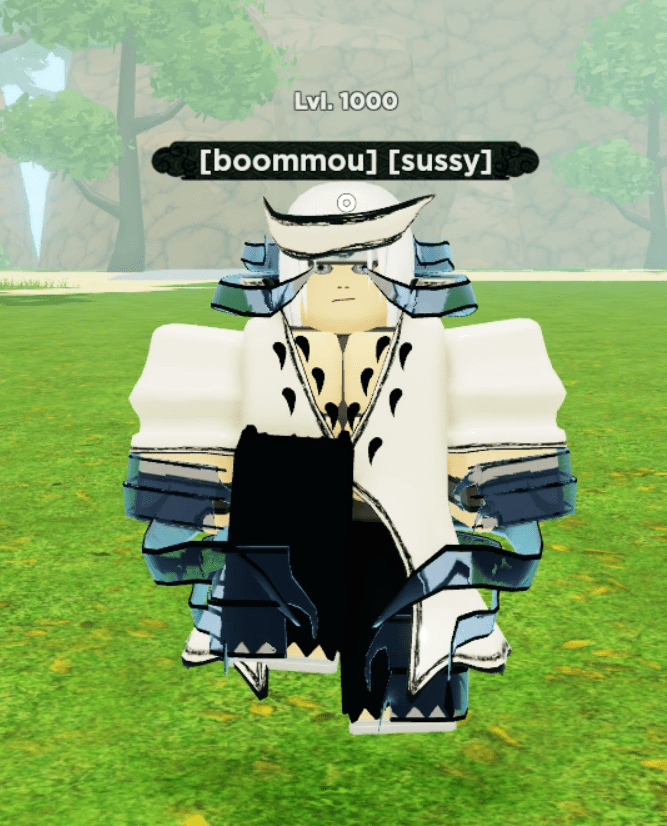
In this mode, you’re correct to anticipate that your character’s appearance changes. Similar to Madara’s Otsutsuki form from the anime (which he gained after becoming the Ten-Tails’ Jinchuriki), your character hones a black cloak with black bead-like objects embedded at the front
Passive Bonuses
In the first mode, your character’s M1s will be replaced by staff swings, the exact same staff that Madara has in his Otsutsuki form. These swings deal high damage and give off a shiver stun – however, it is difficult to take advantage of this stun since the swings do significant knockback. As such, it is difficult to combo with this M1 and I would recommend using it as a staple source of damage. Aside from the M1s, you can also fly in this mode, although of course, it drains massie stamina so don’t overdo it for fun.
Stat Boosts
- +2,800 Chi
- +2,700 Ninjutsu
- +3.000 Taijutsu
- +2,700 HP
C Spec
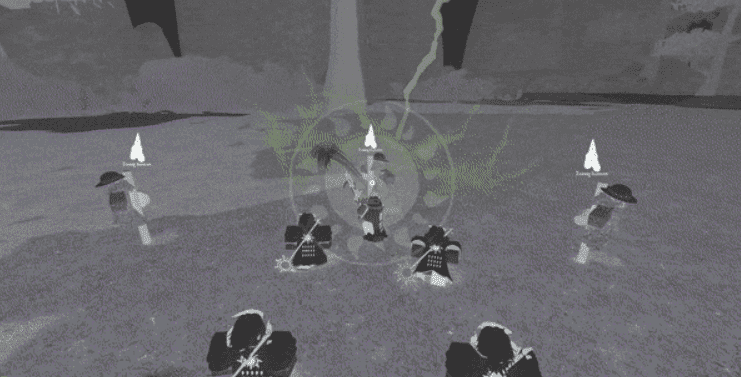
Shindai-Rengoku’s C Spec is quite unique, fun and is one of the few instances in the game where the infamous Shadow clone jutsu from the anime is referenced. Upon activation, four clones of yourself appear around you, becoming your companions – conversely, if you already have a companion out, you won’t be able to use the C Spec since it slots into it. Regardless, these clones will attack whoever you attack; in other words, hitting an enemy will mark them as the target which your clones will rain hell upon.
This is my favorite move from the bloodline’s first mode, partially because of how fun it is to use, even if its damage output may pale in comparison to the Q Spec. A little biased, but my only disagreement with the C Spec is its insane 35,000 Chi cost followed by a 30-second cooldown.
Q Spec
As far as mechanics go, the Q Spec is quite similar to Shindai-Akuma’s Sunflower Devastation, except that its casting time is almost instantaneous. SImply put, your character summons three flowers from the group – these are black with yellow petals and a large red eye on the head. Two of these flowers are medium-sized, while one is comparatively larger; after sprouting, they all collectively target your cursor and shoot devastating laser beams at it.
Hence, one may imagine that the damage output on the focal point of these beams would be massive, which is correct. Unfortunately though, you would imagine such a converging attack to blockbreak, but instead, it only delivers strong knockback. Even so, the best part about this move is its reliability – with instant cast time and a huge stamina requirement of 37,000, people usually see this coming in PvP and if they do, it’s mostly too late. Being someone who has had to deal with Shindai-Rengoku users in PvP, I can assure that it’s overpowered; glad there’s a 20-second cooldown on it!
E Spec
The E Spec is the classic orb attack from the anime, where Madara controls the bead-like objects and uses them on the offensive. In this case, your character summons 7 such objects, where the cost of using each is 25,000 Chi with a 20-second cooldown. As such, I would not recommend trying to spam it and using it between combos whenever you’re at a safe distance and want to deal some chip damage.
Since 25,000 Chi is a great amount, it is genuinely important to keep track of your overall Chi consumption in order to optimize damage output in mode #1.
Mode #2
Unlocked at level 800, Shindai-Rengoku’s second mode comes off as something far more superior than the first. But that begs the question: Is it really worth it at the end of the day? Simply put, what’s new with this mode is a completely different Q Spec and additional passive bonuses that personally seal the deal for me.
Passive Bonuses
Instead of staff swinging M1s from the first mode, your Susanoo (more specifically, a Armored Yang Kor Tailed Spirit) itself makes an appearance whenever you attack or block. This automatically translates into much bigger hitboxes also because this Susanoo is relatively bigger to most Susanoos. Furthermore, let’s not forget that whenever your Susanoo comes out, your character model itself is raised above the ground, something that makes it excruciatingly difficult to blockbreak simply because your enemies can’t reach you!
Stat Boosts
- +2,800 Chi
- +2,800 Ninjutsu
- +2.800 Taijutsu
- +2,800 HP
C Spec
Mode 2’s C Spec is the same as Mode 1’s C Spec.
Q Spec
Mode 2’s new Q Spec is quite straightforward. Upon activation, your Susanoo comes out and hurls long slash-like projectiles towards the direction your character’s looking at – so yes, this means that some degree of aiming is required. However, since these are multiple projectiles, each with a certain probability of successfully hitting, the overall damage output is hard to quantify. On top of that, in my personal experience, the projectile hitboxes have behaved absurdly sometimes by not doing damage despite coming in contact with the enemy.
With that said, I would definitely vouch for Mode 1’s Q Spec as opposed to Mode 2’s. Aside from instant cast time, it does massive damage and is a very concentrated attack whose chances of missing are slim.
E Spec
Mode 2’s E Spec is the same as Mode 1’s E Spec.
Conclusion
In conclusion, the Shindai-Rengoku bloodline is one of the deadliest eye bloodlines in Shindo Life. While some argue that its true potential is unlocked at Mode #2 which is gated behind a level 800 requirement, I beg to differ because this bloodline offers too much at the lower levels. Given how Under the Sun is unlockable at level 65 and Mode #1 is unlockable at level 50, that’s already making your average level 65 player too overpowered in their own league! Such a level of strength consequently makes it a lot easier to grind for higher levels, where the bloodline only gets stronger and stronger.
FAQs
Question: Is the Shindai-Rengoku boss difficult?
Answer: Yes. The Shindai-Rengoku boss spawns at level 2000 and actively flaunts his massive health pool. On top of being a literal tank, he is also fond of chasing you aggressively around the battlefield, using some of the devastating moves discussed in this guide. The worst part is that after reaching half his health, he activates his mode and makes matters even worse. All in all, it’s safe to say you should be trying to defeat Shindai-Rengoku with a well-synergized party or you’ll get steamrolled.
Question: What is Shindai-Akuma?
Answer: Shindai-Akuma is another very powerful bloodline that is known for its clone-creating capabilities and large AOE attacks. You might be reading the Shindai prefix and thinking it is connected to the Shindai-Rengoku, which is somewhat correct. While the Shindai-Rengoku references Madara Uchiha’s Rinnegan, Shindai-Akuma references Madara Uchica’s Mangekyo Sharingan, an equally powerful eye technique (if not more).
Question: How do I get spins for free?
Answer: Although the whole randomized roll mechanic of bloodlines makes Shindo Life look like a gacha game steered towards milking money out of users, it’s good to see that the developers have taken a step back from that. Instead, they regularly give out codes on special occasions and streams (that people document and share to spread awareness about). All you have to do is claim these codes from the Main Menu and you’re done!
Recommended Reads: